7th & 8th Grade:
Cartooning II & Pre-production to Animation (B)
You will be required EVERY DAY to bring a:
-Pencil
-Sketchbook
-Notebook
Absolutely no exceptions.
Most, not all, of the assignments for the year will be below to give you an outline on what to expect as well as what we will be doing this year. The directions, examples, links will be below for each project. 🙂
Homework will also be assigned every Tuesday and Thursday.
Contact me at: TYSONANIMATIONEO@GMAIL.COM with any questions.
Today you will be learning about our animation program with a presentation! You can follow at the link below.
You can also refer to syllabus at the link below.
Syllabus
You will be required EVERY DAY to bring a:
-Pencil
-Sketchbook
-Notebook
Absolutely no exceptions.
Do not forget your pencil.
You will be using this website every day as well as Schoology, Focus, & storing your work in a Google Drive.
I will go over all the technology tomorrow!

#1: Syllabus & Intro Presentation
-Please complete form at link below. 2-3 FULL SENTENCE answers.
-Log into Schoology and make sure you are in my class:
-Create a GMAIL email address & log into google drive:

#2: Getting to know you & Other
Today we will be watching two videos on the process & principles of animation to become more familiar with it.
-Short video & Worksheet on intro to animation:
Watch the short video and complete worksheet on 12 principles:

#3 & #4: Animation & the 12 Principles
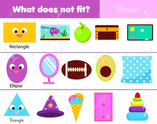
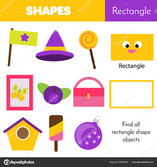
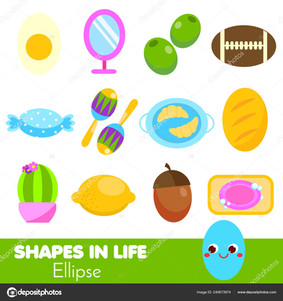
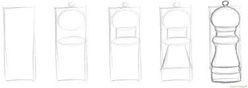
-Write down a list of the 5 basic shapes.
-Draw 5 RECTANGLES keeping in mind width, height, volume, line quality and negative space. Take your time.
Remember: They should be exactly identical to each other as possible.
Hint: Pay attention to the space inside the shapes and compare all your shapes to the first one that you have drawn.
Continue with 5 of each ONLY after being approved to move on.

#5: Basic Shapes Intro Tutorial
You will need a notebook each day we will cover history as we go through early animation history on the overhead projector.
It is extremely important that you take and keep your notes. Take care of them & bring them each history day.
We will be watching clips, films, taking notes, and learning a lot. Fun fact: Animation history is my FAVORITE!
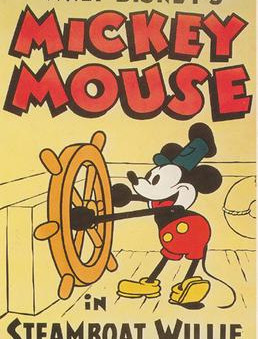
#6: Intro to Animation History
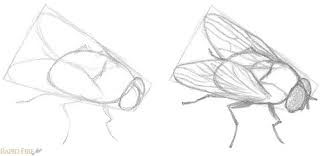
In this project, we will be making different combinations of the basic shapes to represent real life objects.
Think of an ice cream cone. It is made up of a circle and a triangle! Another might be a shelf with books on it, or a table made of a square and four rectangles for legs.
Your job is to create 5 different shape combinations of objects that you have seen in real life. Try and think as creatively as possible. Make sure to draw the shapes first.
The objective is to use shapes to draw, not just draw objects. (Important! This is called a breakdown and we will be using this technique in every aspect of animation over the next 6 years.)
While you are doing this, make sure you are still paying attention to your lines. They should be clean, even, and the same width at all times.
Try not to push down too hard or too light and keep your paper clean!
Wrinkled or ripped projects and assignments will have to be done again.
s.

#7 Combining the basic shapes
#9 3D Forms

1. -Answer the question in a paragraph: What is the difference between forms and shapes? What are the names of the 5 3D forms?
2. Draw 5 of each of the 3D forms, again, keeping in mind width, height, volume, and negative space.
Remember: They should be exactly identical to each other as possible. Hint: Pay attention to the space inside the shapes and compare all your shapes to the first one that you have drawn.
We will be using our new knowledge of 3D forms to break down real life objects so that we can draw them accurately. If you think of any object, they are made of basic forms. This makes drawing
anything EXTREMELY easy once we learn this!
There will be objects below an we will analyze what basic forms make up these objects, then we will start drawing them by drawing the basic form of the object and adding the other basic forms that make it up.
After we are done, then we will add curves and details to finalize. There is no detail to be done before the breakdown ever.
#10 Bottle
#11 Table
#12 Couch
#13 Lamp

#10, #11, #12 A break down of basic 3D objects
-Answer the question in paragraph form with a heading: What do you think a light source is? What do you think shading is? How do you think light will effect your drawing? What would happen if there was no light source in a drawing?
Create 5 gradients going from dark to light. Focus on the pressure you are putting on your pencil and the direction of the light source.
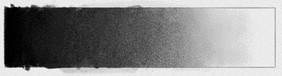

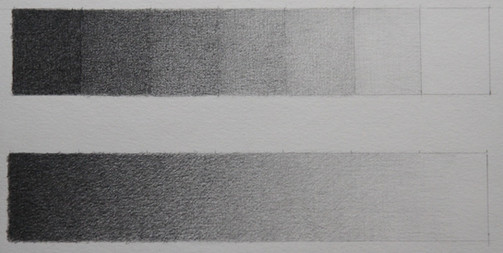
#13 Shading Gradients
-Shade the cube first to the light source following the lesson
-Shade the Cone following the Lesson
-Shade the cylinder following the lesson
-Shade the sphere following the lesson and light source.
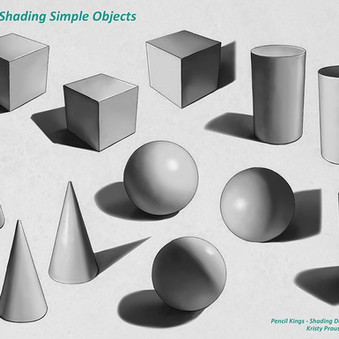
#14 Shading 3D Forms
-Choose one of the still life below.
(We will be drawing and shading two of them.)
-Break down scene table & walls
-Break down into basic shapes. Pay attention to the negative space.
Do NOT add details
-Shade with textures to light source.
-Add shadows
-Add highlights


#14 Shading 3D Forms
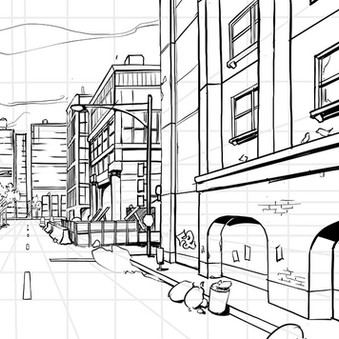
Answer the question in a paragraph: What is perspective? What are the three parts to a perspective scene?
We will be drawing the image below. We will be drawing it together and your homework will depend in which step you are on. The steps are listed below and they will have a homework number next to them.
1. The first step is to find the horizon line and vanishing point.
2. The next step is to start breaking down the scene, in this case there are many buildings. Pay attention to where the buildings are in this scene and compare it to where the vanishing point and horizon line are (use them as a reference and look at your negative space.
3. Start putting the road and sidewalks in but watch how wide the road it.
4. Then put the buildings in one by one (start in the back.)
5. Move towards the buildings in the front (only the basic shapes.)
6. Clean up your entire scene
7. Begin adding the line and the details to the buildings in the frot and then more towards the back. (Remember: Details on buildings are small. Keep in mind how small your door or the window in your house looks compared to the whole building.)
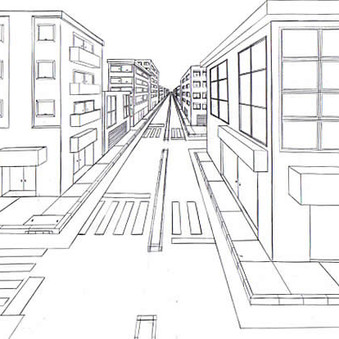
#17 One Point perspective
Follow instructor led lesson.
-Find Vanishing point
-Find horizon Line
– Breakdown all buildings
-Add details
#18 One Point Perspective #2
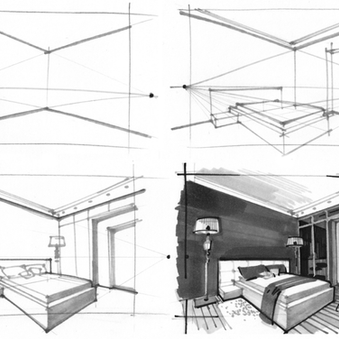
1. The first step is to find the horizon line and vanishing point.
2. The next step is to start breaking down the scene, in this case there are many distractions but not many actual large objects. Pay attention to what the large basic shapes are in this scene and compare it to where the vanishing point and horizon line are (use them as a reference and look at your negative space.
3. Start putting the walls and the ceiling and ground in but watch how wide and the length they all are.
4. Then put the large basic shapes in one by one (fridge stove, countertops (start in the back with absolutely no detail.
5. Move towards the objects in the front (only the basic shapes nothing other than one of the 5 basic shapes.)
6. Clean up your entire scene as this should be mapped out for you to start adding your details
7. Begin adding the line and the details to the buildings in the froNt and then more towards the back. (Remember: Details are small. But they are also STILL IN PERSPECTIVE)
#19 One point perspective scene INTERIOR
Follow instructor led lesson.
-Find Vanishing point
-Find horizon Line
– Breakdown all buildings
-Add details
#20 Two Point perspective
Follow instructor led lesson.
-Find Vanishing point
-Find horizon Line
– Breakdown all buildings
-Add details

#21 Two Point perspective #2
Draw the classroom from you point of view.
You will find an example of an observational drawing on your left. An observational drawing is a drawing from your point of view. it is to be drawn as close to reality as you see it.
As we will be working on this for a couple of weeks, you will need to block out the piece first quickly with all of the breakdowns. The steps are listed below:
-Find the vanishing point & Horizon Line
-Block out the large objects into their basic shapes
-Block out the small objects
-Add all details
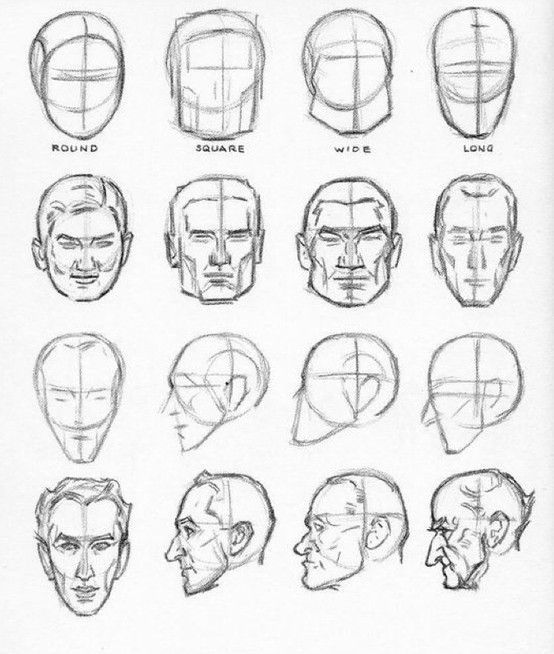
2. Seen in Profile:
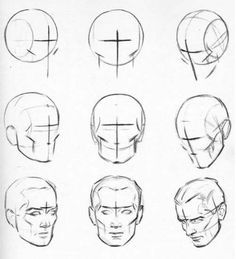
From the side, the head is still shaped like an egg, but pointing towards a corner. The midlines now divide the head into front (face) and back (skull).
On the skull:
- The ear is just behind the central line. In size and vertical positioning, it still fits between the upper eyelid and the bottom of the nose.
- The depth of the skull varies between the two dotted lines shown in step 4.
On the face:
- The features are placed the same way as above.
- The hollow at the root of the nose either coincides with the midline or is slightly above it.
- The most prominent point in the brow is 1 point up from the midline.

3. The Features
The Eyes and Eyebrows
The eye is simply two arcs forming an almond shape. There’s no particular rule here because the eye shape can vary a great deal, but we can note the following tendencies:
- The outer corner of the eye can be higher than the inner, but not the reverse.
- If the eye is compared to an almond, the rounder part would be towards the inner corner, with the tapering part in the outer corner.

Details of the Eye
- At rest, the iris is partially hidden behind the upper lid. It only intersects the lower lid if looking down, or if the eye is narrowed so that the lower lid rises.
- The eyelashes sweep outward and are shorter on the lower lid (in fact it’s unnecessary to draw them most of the time).
- Whether to show the small oval of the tear duct in the inner corner, and the thickness of the lower lid, is a personal decision that depends on one’s style, as too much detail does not necessarily look good; detail should certainly decrease with the scale of the drawing.
- The same goes with the fold of the eyelid, which in addition contributes expression and can make the eye look less alert. I find that when a drawing is too stylized, or so small that the fold can’t be included without changing the expression, it’s best to omit it.
In profile, the eye takes on the shape of an arrowhead (with the sides variously concave or convex), with a little hint of the upper eyelid and possibly of the lower as well. In real life you wouldn’t see the iris from the side, you’d only see a white eye. When I did that in my work, I received so many “this really looks weird” comments from readers that I had to start including at least a hint of the iris.
As for the eyebrow, the simplest way to draw it at rest is to make it follow the curve of the upper eyelid. Most of the eyebrow body is towards the inside, with the outer tail slightly or much shorter.
In profile, it changes shape completely and becomes comma-like. The comma appears to be the continuation of the eyelashes before curling back on itself to and over the eye – indeed sometimes it looks connected to the eyelashes, so that you can draw in a single curve the upper line of the eye curling back to become the eyebrow.
The Nose
The nose is roughly wedge-shaped, a shape that’s easier to visualize and draw in 3D before detailing it.
The bridge and sides of the nose are flat surfaces that may be only implied in the final drawing, though it’s important to put them down in the buildup sketch so the detailed part of the nose is placed and sized correctly. This is the bottom flat side in our wedge, a truncated triangle connecting the wings and the tip of the nose. The wings curl inwards into the septum, forming the nostrils – note in the bottom view below how the lines that form the sides of the septum are at the fore and start from the face, not the other way around. The septum juts out lower than the wings when seen from the front, which also means that in 3/4 view, the further nostril is hidden by it to a varying degree.


The Lips
Notes on the mouth and lips:
- The slit of the mouth should be drawn first as it’s the longest and darkest of the three somewhat parallel lines forming the mouth. It is not a simple curve but a series of subtle curves. In the figure below, you can see an exaggerated example making the movements of the mouth line clear; note how they reflect the line of the upper lip . They can be softened in a number of ways, the central dip can be very narrow for a pointed look, or so broad its presence is attenuated – but it can even be reversed when the lower lip is fleshy, and that creates a slight, natural pout. If achieving symmetry in this line is challenging, try starting from the center and drawing it out one way, then return and do the other side.
- The upper lip’s two peaks are much more obvious, but they can similarly be softened into broad curves, even so softened that they blend into a “peakless” lip.
- The lower lip on the other hand is always a smooth curve, but it can range from nearly flat to generously rounded. It’s always good to mark the lower lip, even with a mere dash.
- The upper lip’s nearly always thinner than the lower, and its sticks out from the face less than the lower. If it’s outlined, it should always be done more finely than the lower, because the lower lip’s outline is emphasized by its shadow (as thin as it is!)
- From the side, the lips take on an arrowhead shape and the jutting of the upper lip becomes clearly visible. So does the contrast between the profile shape of the two lips: flatter and diagonal for the upper, rounder for the lower.
- The slit of the mouth, from the side, slants down from the lips. Even if the person is smiling, it slants (or curves) down before rising again into the corners. Never slant the mouth straight up in profile.
Part 2.
Part 3.


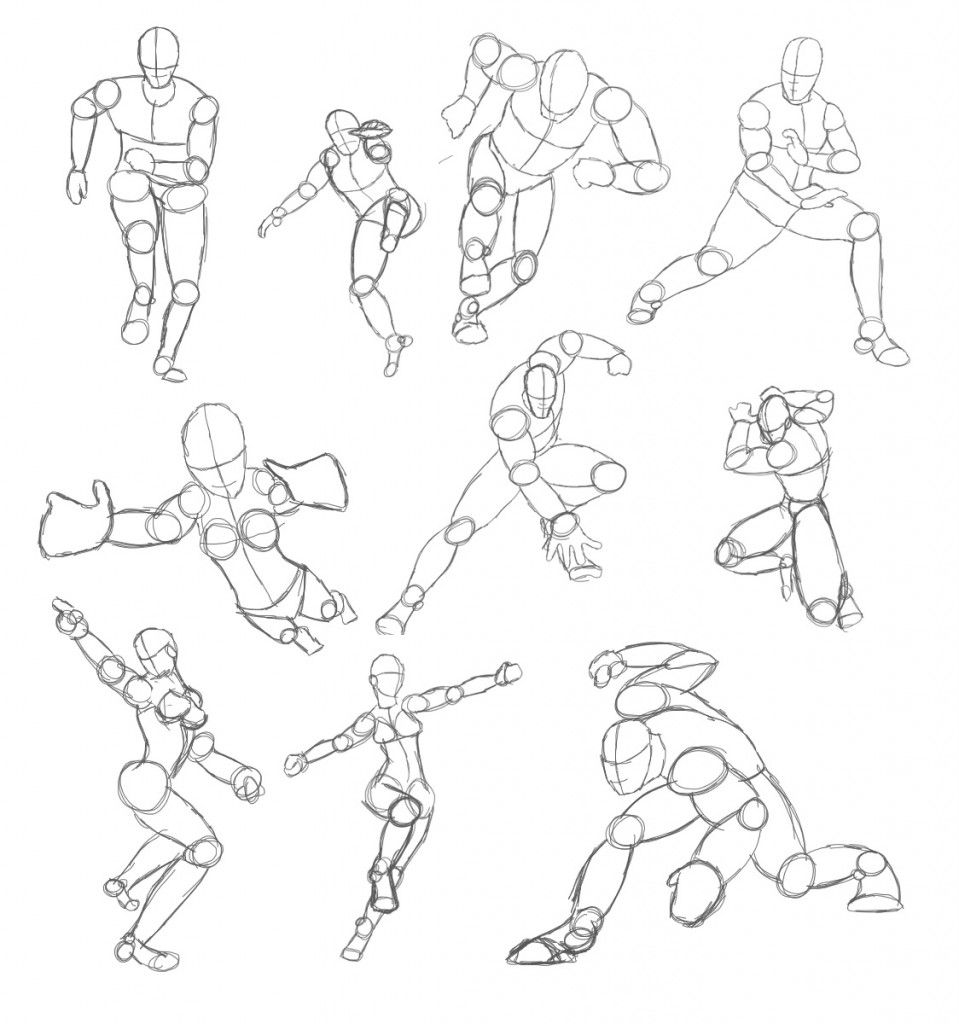
Assignment 9: Body anatomy
-Answer the question in a paragraph: What does ON MODEL mean? Why might this be important to us?
Since we have been introduced to simple cartoon anatomy, we are going to expand your knowledge a little by learning about a more realistic human anatomy. Humans proportions are less exaggerated and are more complex. The steps to create a human are very similar though so we will be following some of the same steps. Your homework will depend in which step you are on. The steps are listed below and they will have a homework number next to them.
1. The first step is to look at the person and break them down into basic shapes. What shapes are they made of? The shapes will most likely be combined with other shapes. (if you need to you can draw lines and think of them as bones. Then add the basic shapes after)
2. Find the spine line. Where is this characters spine? Lets imagine we can see him in 3D. Where would it be if this character was alive?
3. Lets start mapping this character out. Start with the spine (keeping in mind the size of the character compared to the size of it’s spine.) After we have the spine, lets layer the character’s basic shapes on top while keeping in mind human anatomy.
4. Change the shapes size and variables depending on the person we are drawing.
5. After we have the basic shape(s) for the torso, lets move on to the feet and hands. . *Remember the size proportions. Do they match with the characters hands and feet size?
6. Lets begin to connect the hand and feet to the body with lines. Add a break if the knee or arms are bent.
7. Lets add weight to the characters arms and legs. Changing from lines to their basic shapes.
8. Lets add the basic shape for the head. This is another breakdown. Keeping in mind the size proportions and always NEGATIVE SPACE!
9. Everything should be broken down now. This breakdown should resemble a human. We will now add our curves and polish our lines for the actual finished person. We will start with the torso and move to the arms, legs, hands. and feet.
10. Finally we will breakdown the face and head. Use your negative space and size proportions to the character.
11. We will clean up the drawing!
Assignment 11: Cartoon Poses on model
-Answer the question in a paragraph: How does the spine line tell us what action the character will be doing?
We will be drawing the cartoon character poses below. We will be drawing it together and your homework will depend in which step you are on. This will help us learn more about how characters move and also how their still poses reflect personality and movement. We will be using what we have learned in the last project and using it to put our characters in different positions. Remember: Anatomy and breakdowns are very important here. Imagine how a skeleton or a human would look like doing this pose.
Part 1: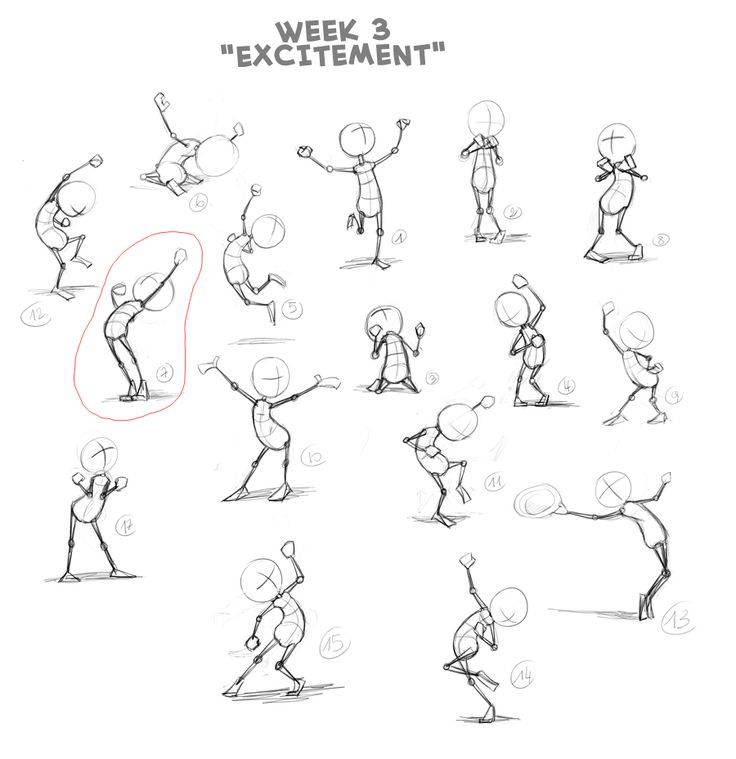
Part 2:
Part 3: 


The steps are listed below and they will have a homework number next to them.
1. The first step is to look at the character and break them down into basic shapes. What shapes are they made of? The shapes will most likely be combined with other shapes.
2. Find the spine line. Where is this characters spine? Lets imagine we can see him in 3D. Where would it be if this character was alive? (this step is extra important in this case)
3. Lets start mapping this character out. Start with the spine (keeping in mind the size of the character compared to the size of it’s spine.) After we have the spine, lets layer the character’s basic shapes on top while keeping in mind human anatomy. What part of the body does the spine connect to. What connects to the spine or those body parts after that.
4. Change the shapes size and variables depending on the characters width and height. Does your shape resemble the part of the character? Do they look alike?
5. After we have the basic shape(s) for the torso, lets move on to the feet and hands. Why not the legs and arms? Placing the feet and hands allow you to draw the arm and legs in perspective easier. *Remember the size proportions. Do they match with the characters hands and feet size?
6. Lets begin to connect the hand and feet to the body with lines. Add a break if the knee or arms are bent.
7. Lets add weight to the characters arms and legs. Changing from lines to their basic shapes.
8. Lets add the basic shape for the head. This is another breakdown. Keeping in mind the size proportions and always NEGATIVE SPACE!
9. Everything should be broken down now. This breakdown should resemble your character. We will now add our curves and polish our lines for the actual finished character. We will start with the torso and move to the arms, legs, hands. and feet.
10. We will break down the character’s details, clothing, accessories, and such. After our breakdown, we will clean up those lines as well, using our breakdown for a guide.
11. Finally we will breakdown the face and head. Use your negative space and size proportions to the character.
12. We will clean up the character(s)
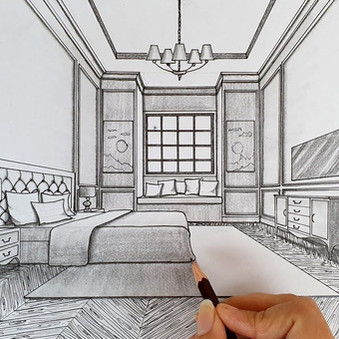
Assignment 10: Interior scene:
Choose one to draw and color on large board.


Model Sheets


